Thursday, 15 December 2016

Heather: Speedy makes and December sew far

Once again it's been a month since I shared my makes with you (really, where has 2016 gone?), but it's been a really productive month at the sewing machine, so I thought I'd give you a bumper roundup of some of my recent makes. Each of these projects were "speedy sews", made in a single evening, or in some cases, just a few hours! Hopefully you'll feel inspired. 
 

Velvet Burnout Party Dress
 
First up is Threadcount 1613 made up in a sparkle velvet burnout fabric, made up in around 4 hours. I made quite a few adjustments to this pattern, particularly on the back panels and shoulders, both of which were shortened and tweaked by about an inch to get a more precise fit in the bodice. The fabric itself is quite firm- it has stretch but behaves more like a stretch denim than a jersey- but this allowed for a really close fit without compromising my ability to breathe! 

I'm not normally a fan of a peplum, always believing them to make my bum look big, but I pinned this one together and was pleasantly surprised with the fit and styling, so it made the final cut!


Floral Heather Dress
 
Next up, a version of the Heather Dress by Sew Over It (I had to!). Again, a one-evening make as I had already made a version in red sweater knit for practice and I was able to make the entire garment on the overlocker. The fabric is a heavy weight jersey with a low % stretch. The slightly lower than required stretch meant that I needed to allow a little more room over the bust and across the arms than the previous version. I also made two simple alterations to this pattern, adding a cuff to the sleeves (cut sleeves shorter, sew a rectangle of fabric, short edges together, fold lengthways, attach to sleeve!) and a slightly deeper neck band for a roll neck effect. This dress is so comfortable that I want one in every colour!


Stripy Jumper Dress
 
My next speedy make was a self drafted jumper dress made after work on a Friday evening (started at 4.30) and worn out to dinner the very same night (at 6.30!). The pattern started life as a simple shift dress from Burda, to which I added a grown on sleeve, to make, essentially, a giant t-shirt! I've made this pattern up before in black and white ponte and it's a real wardrobe staple for warmer days in the office, so when I saw the pink and navy stripe I knew exactly what I wanted to make. On this version I lengthened the sleeve to the elbow and then added a panel for the lower sleeve. I also added a wide neckband for an extra level of coziness! 
  

Dashwood Annabelle 
 
And last, but by no means least, we have Annabelle, the absolutely gorgeous new floral dress I whipped up last weekend to wear out for lunch with my Nanna. The pattern was free with December's Love Sewing Magazine and the design was quite straightforward. The new Paper Meadow range by Dashwood has some beautiful coordinating fabrics and I knew straight away I wanted to use these together. I also picked up some orange cotton lawn to use as the lining and set to work! As usual I shortened the back length by about an inch at the lower back, and also at the shoulder by 1/4". I did also adjust the front bodice length slightly at the neckline, deepening the curve by about 1/2". I started sewing after Saturday night's Strictly and was at the restaurant by Midday on Sunday! 


-
All of the fabrics used were sourced from Fabric Corner at the Craftea Sewing Bee Shop, 22-24 Melville St, Lincoln. Call in for your next speedy sewing project!

Saturday, 12 November 2016

Heather: African Adventures

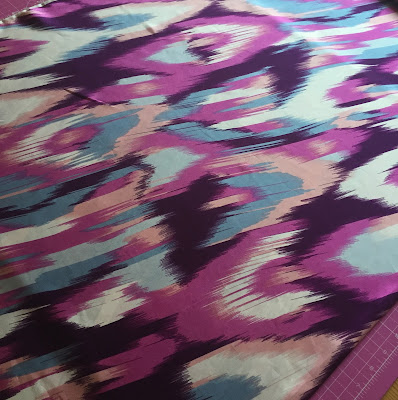
The last few weeks since our holiday have absolutely flown by and I have been holed up in the sewing room with a couple of really special secret sewing projects (try saying that three times quickly!), which I hope to share with you at some point in the future. In between circles of chiffon and layers of lace I managed to squeeze in a quick selfish sew in this stunning African Wax Print from Fabric Corner.

Unsurprisingly, I picked this fabric with absolutely no idea what I would make with it, (stash? What stash?) but without doubt that it was too good to leave behind. If you've handled african wax print before you'll know that the fabric itself is quite stiff- the texture is like a good quality wrapping paper. It has movement but doesn't drape, and it didn't really soften in the wash. After sitting in my stash for several weeks an event came up which I knew the fabric would be perfect for and I set about finding an appropriate pattern. A quick research on Pinterest for pattern inspiration found a whole host of elaborate wax print dresses with full skirts, fitted bodices and, often, exceptional pattern matching. No pressure then. 

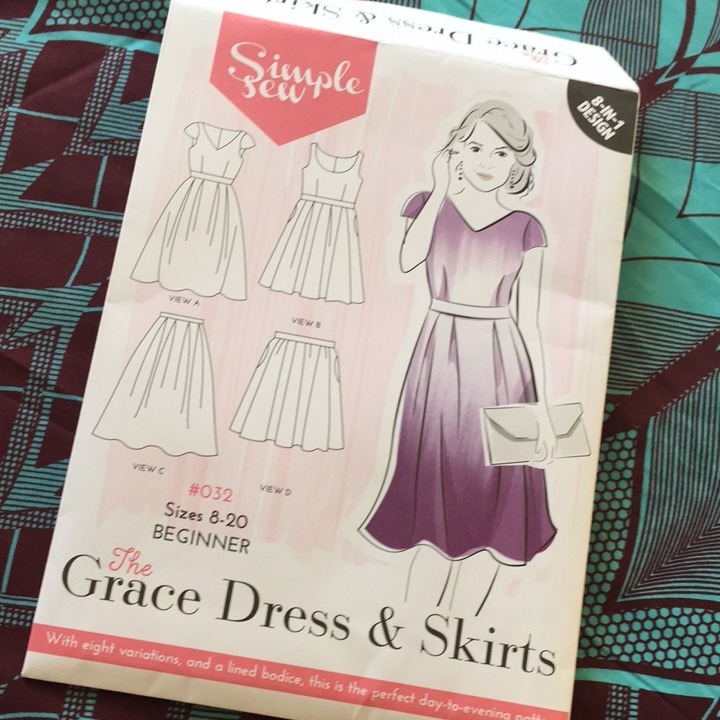
Looking at the images shared by others I realised I needed to make a full skirt with pleats rather than gathers, and a simple bodice that would show off the pattern without too many seams. A search through my pattern stash came up short, and just as I was about to fetch my trusty pattern block to begin drafting I picked up a copy of Love Sewing magazine with the free Grace Dress pattern on the front. Fitted bodice and full pleated skirt? Perfect!

Now, I've had a fair bit of experience with pattern matching to date but this print was really a level above. I wanted to make the most of the varied print sections on the fabric and use the heavy border mostly in the skirt. After tracing out the entire pattern as 'full size' pieces (i.e. not on the fold), moving them about on the fabric for about an hour and wishing I had a longer ruler to line up the stripes with, I decided to abandon the skirt pattern pieces in favour of drafting the skirt from scratch. I started by working out the finished garment length, and then marking a chalk line along the full 2m length fabric. I then chose the detail I wanted for the centre point of the skirt, marking this again with chalk, eventually dividing the full two metres into one large and two slightly smaller rectangles. I shaped the waist slightly and then stitched the blocks back together to make the basic skirt. I was pretty pleased with the pattern match in the side seams!
Can you spot the seam?
I made up a quick toile of the bodice to check the fit. Simple Sew patterns are known for being quite roomy but this looked quite small and I was right to be wary- I made a few adjustments and increased the waist size by reducing the back darts, and swinging some excess from the armscye into the waist to get a really good fit. I did include the short capped sleeves on my toile but the shape totally didn't fit me (maybe I have fat shoulders?!) so I drafted a split sleeve instead once again inspired by pinterest.
They look like giant moustaches! 
I spent a considerable amount of time choosing how to place the pattern on the bodice, and used a reverse pattern piece (also known as a piece of paper with a bodice shaped hole in it) to work out where the pattern would sit, eventually deciding on two strong lines either side of the centre at the waist. I pleated the skirt panel to match the pattern from the bodice- much easier than trying line up pleats from the pattern piece.

Pattern matching the skirt and bodice.
I made the waistband out of a single strip of fabric, so it was important for the bodice fit to be perfect before I attached it- no going back once the waistband was cut!


Pattern match through the waistband. 

I took my time to make sure the pattern matching was exactly right!
Pattern match through the zip.
Sleeve detail.
So after a number of weeks of waiting to show this beauty off the special event finally arrived and here is my dress! I can't pretend I'm not super proud of this one! The pattern itself was so simple but the addition of such a bold pattern really set me a challenge. And I loved every second of it.


--
The fabric used in this post was kindly provided by Fabric Corner Lincoln, based at The Craftea Sewing Bee Shop, 22-24 Melville Street Lincoln, and at Lincoln's Historic Central Market.

Saturday, 1 October 2016

Heather: His n hers on holiday


About a month ago, shortly after booking our late summer holidays, Mr returned from the high street bereft at the lack of summer attire available in early September, and asked me to have a go at making him some shorts. He didn't want anything fancy, but these shorts ideally needed to have have angled front pockets, two proper back pockets (not the welt kind) belt loops, a fly fastening and be made from ticking, ideally with a blue stripe, and red contrast top stitching... Did I mention this was three weeks before the holiday?!.
I'm not sure, then, if it was shock, or a generous helping of wine that found me agreeing to spend a Friday evening, originally designated for my own holiday makes, searching for a suitable pattern for these perfect holiday shorts. 

In the end my searching was actually relatively painless once I came across the range of menswear by Thread Theory , in particular the Jedediah 'Pants' (Trousers!). A quick hashtag search online (good old Instagram) suggested that the pattern generally yielded good results, wouldn't be too difficult to make and there was also a handy video sew along for the tricky bits. I downloaded the PDF and instructions (very handy given the limited time available) and, as an additional bonus, I was able to lay my hands on some really smart blue and white heavy cotton ticking at local favourite Fabric Corner (I believe they have several colour ways available). 

So it turns out that menswear isn't all that different to womenswear (I know, who knew?!). There were a couple of techniques in the make that I hadn't handled before, namely flat felled seams and a concealed fly, but the instructions were clear, and I was able to resort to that video tutorial for clarity on the fly, meaning I was able to complete this part of the make inside 15 minutes!


In the end it took 2 evenings to fully complete this make (about 8 hours) but it was totally worth it for that happy-faced husband at the end!


...
The day before the holiday, having finally made a start on the packing, I realised that I probably needed some shorts too...

Really restricted on time at this point (less than 48 hours to go), with a wedding outfit still to alter and the rest of the packing to finish, I went straight to the to Burda Style website find a suitable PDF pattern to download. I've made a fair few Burda pieces in the past and knew I wouldn't need to make too many fit alterations to one of their basic patterns. I found a really simple pattern without any fancy details and rooted out some floral cotton from my stash (purchased last summer from Fabric Corner) which I knew I wouldn't miss too much if everything went awry.

I opted for a size 10 waist into a 14 hip, knowing that I'd be able to alter later, and also extended the back waist height by an inch having used my flexi ruler to check just how big my bum is (so glad I know in cm now... 😉 ). I also added a couple of inches to the length as I wasn't ready to show quite that much leg!

The construction of these shorts was much, much simpler than the previous pair. The only fit alteration I made was to pull in the centre back seam by about half an inch for a better fit at the waist. In seam front pockets and no back pockets meant that the rest of the garment stitched up quickly (working against the clock here!) I then proceeded to break 3, yes 3 needles whilst trying to put the zipper in- "more haste, less speed", I can hear my mother saying- and abandoned the sewing for the evening. I set an early alarm to finish the shorts, which as expected with fresh eyes, were finished, pressed and in the suitcase inside about 20 minutes. 

 
So there we go. His and hers handmade shorts on holiday. My tip for you all? Start planning your holiday wardrobe now...
 

Saturday, 24 September 2016

Heather: Badgley Mischka Wedding Outfit

Today I attended the wedding of some good friends (Congratulations Mr and Mrs S!) and, of course, I was wearing handmade! 
My hunt for a pattern worthy of the occasion started on the pattern pages at Sew Essential. I particularly like Sew Essential's website for browsing patterns because you can search both by type of garment, and by designer. I don't know about you, but I find it frustrating when I have to flick between lots of brands to find what I want- I just want to look at ALL of the dresses! In the end, my inspiration came from Sew Essential's twitter post:
@sewessential: New season Vogue #sewingpatterns now in stock here https://t.co/mNys0VIOhf there are some beauties! @McCallPatternCo
Vogue 1513
— Sew Essential August 18, 2016
Once I had finished swooning over the pattern I set out to look for a suitable fabric (Of course, there was nothing suitable in my stash...). Now you'll recall from a few posts ago that Sew Essential have a great selection of dressmaking fabrics, and I was really spoiled for choice choosing a suitable fabric (they really are all gorgeous). I finally whittled my 15-strong selection down to this beautiful smudged paint print by John Kaldor in a polyester Crepe de Chine. 

John Kaldor Cassandra fabric available at Sew Essential.
The fabric has really beautiful drape making it perfect for the shoulder detail on the dress. It also means that it's pretty slippery, so my first step with this pattern was to trace out all of the pattern pieces in the correct sizes onto dot and cross paper, and in the full size rather than on the fold. This meant that I didn't have to battle with the slippery fabric in two layers. I made up a toile using some peach viscose lining fabric which was a little crisper than the crepe de chine, and I hoped this would give the dress some body. 

It turns out that making a toile was a pretty good idea! I started with a size 6 graded through to a 14 at the waist and hips. I shortened the back shoulder length by an inch and reshaped the armholes for comfort. Once I had completed the toile I then proceeded to resize the waist of the dress back down to a 10/12- it was huge! I also made some minor adjustments to the top of the princess seam under the arms (this detail will be important later) to improve the fit across the bust. 

Happy with the toile fit I made the alterations to the paper pattern and cut my dress out with my trusty rotary cutter and cutting mat. It still moved around a lot, but was certainly easier than using scissors. I assembled the main garment and then cut out the drape, finishing it with a machine-rolled hem for a neat finish. 

Drape detail.
I hadn't cut the drape out when I did the main dress cutting, as I wanted to avoid any excess fraying. It turns out that this is, yet again, one of those times where I should have read the instructions... You're supposed to insert the shoulder drape into the front right princess seam, tack it in place around the armhole and neck, and then attach into the centre back. Of course, I had already stitched and overlocked all of these seams... cue stitch unpicker.

The second challenge with the drape was the fit. Remember all of those tiny tweaks I made around the armholes earlier? Turns out I needed to transfer those onto the drape too, as the drape fits closely into the shape of the armhole. I had removed about an inch from the armhole depth and length you can see in the picture below that the underside of the drape hangs about 2 inches lower than the top layer.  Desperate to avoid reshaping from the bottom of the drape and ruining my rolled hem, further unpicking was required.

Drape detail
The rest of the make was much smoother. I finished all of the seams with the overlocker and hand stitched the hem. I even found time to make a matching fascinator, and asked my friend to design me some matching nails!


Here's the finished dress in action. What do you think?


--

The fabric and pattern used in this blog were kindly provided by Sew Essential. Browse the site at www.sewessential.co.uk

Tuesday, 13 September 2016

Bridie: Project Runway Purple Playsuit


So back in May (I know a while ago now) myself and Heather went to the Big Simplicity Blogger Meet Up. Which was a fabulous day, we learnt so much and met lots of lovely people including Lucy from Sew Essential who asked if we might like to do a post featuring they're fabric. Off course we jumped at the chance. When I came to look at their website I was very impressed with how easy it was to look around and thrilled with the beautiful fabrics they have. Although that did make picking a fabric difficult, eventually I found this beautiful John Kaldor fabric which I thought would make a fabulous playsuit. So then began the search for a playsuit again this also took me a while there are a surprising amount of playsuits on the website. The one I eventually decided on was Project Runway Simplicity 1158. I was originally going to make the V neck version but decided as my shoulders are unable to hold anything up with out help, I thought to save any embarrassing flashing situation I went for the sleeveless halter neck version, much more sensible for me! 

Unfortunately life got in the way of me starting this project when I had planned to. I was asked by a friend to help out with some costumes as she had been dropped in it. Of course i said yes and we had a laugh doing it but not being able to sew what I wanted to (especially as everything I was sewing was beige and I NEED colour in my life!) did send me a bit loopy! I mentioned this and my issues with anxiety in my previous Vlog if you fancy a look.

So when I finally did get to work on this project it was a sheer joy. I thought the fabric might not play ball as it has a sheen, but to my delight bit behaved beautifully! Although I had to make sure i was careful when it came to the right and wrong side of the fabric, there was a difference although only a slight one. I would suggest working in a well lite room when working with this fabric. 


I would say the pattern is good for intermediate sewers or beginners who want to go up a level. I found it a nice way to get back into proper sewing, I had to make sure I read the instructions properly although as always with commercial patterns that doesn't always help! Although once I'd figured out what they were trying to tell me (especially when it came to the pockets) it came together very nicely!   

I am so pleased I think I picked the perfect pattern for this fabric and I'm so glad I went for the halter neck version although its hard to do up if you don't have help. I faced the arms with cream bias binding which I think works well.


The neck tie at the back is a really pretty feature, I think if I'd used a more shinny fabric I'd be worried it would come untied but because this has a textured feel it holds well.


My favorite part is of course the pockets, got to love a pocket! Another nice feature is the elasticated waist, as a mum I'm all for being comfortable with out looking frumpy which I think this does very successfully.


So here it is I love that it works well in Summer but also Autumn with thick tights and layered up. I thick it goes well with the colours I wear in Autumn which tend to be jewel colours, tan, black, and khaki. 


I hope you've enjoyed this post, I'll be doing a twirl in this playsuit in my neck Vlog so keep your eyes out for that, you might get a better idea of how it wears.

Happy Sewing x  


Saturday, 27 August 2016

Heather: Bank Holiday Botanical Button Back Blouse


We've been enjoying a spot of sunshine here in Lincoln (between the thunderstorms) so when I picked up a metre of this beautiful botanical print linen/viscose mix fabric from the Craftea Sewing Bee Shop last week I decided to top up my summer wardrobe, with the added challenge to make myself to make something other than a dress, for a change!


Seeing as I don't often make anything other than dresses, I was lacking a suitable pattern in my stash so I dug out the pattern from my custom fit blouse, made back in February, and decided to adapt it for a summer version. I removed the sleeves and narrowed the shoulders by an inch, widened the neckline and split the back panel down the centre, adding a button channel to make things interesting!

The print on this fabric is huge- the detail you can see above is a good handspan wide- and it also runs in two different directions. This would be ideal for a shift dress where the whole pattern can be shown off, but in the interests of sticking to my plans I set about making the most of the detail for my blouse.  

Pattern match through the button channel on the back.
I started by cutting two panels for the back, paying extra attention to the pattern match over the button channel. I carefully placed the front pieces to have a centre front detail and cut two side panels to complement the design.


Aren't these the prettiest facings?
As my previous pattern had sleeves and a collar, I didn't have any existing facings for my new blouse, so I drafted some from the fabric scraps. The inside of this blouse is as pretty as the outside!


Here's a pic of the back of the blouse. Despite measuring thrice, I somehow miscalculated on the button channel at the back and, in order to ensure the pattern still matched, I had to use a very narrow button channel through the back. After wearing the blouse for a day the linen had started to lose its firmness, so I had a bit of a rethink later on, stitching up the centre back, adding "fake" button detail down the new seam and inserting a side zip instead. No one will ever know...
Me with Mum's prize Dahlias.
Despite a few tweaks required after the first wear, I'm absolutely thrilled with the result of this top, and I should be able to wear it with jeans on those stormy days too. I'll definitely be making a few more tops in future.

Enjoy your Bank Holiday weekend! 

--
The fabric used in this post was kindly provided by Fabric Corner Lincoln, based at The Craftea Sewing Bee Shop, 22-24 Melville Street Lincoln, and at Lincoln's Historic Central Market.


Wednesday, 10 August 2016

Heather: Project Runway "Missoni" dress

It's been a little while since my last post, due in part to holidays, and also to some very challenging projects! So I thought I'd take a few minutes to show you this gorgeous zigzag lace dress that I made back at the end of July. 

I was given the pattern at the Big Simplicity Blog Meet back in May and didn't really think I'd ever use it, but when I spotted the fabric, which is really similar to the picture, I thought I'd give it a go.


The fabric is from Fabric Corner in Lincoln and was a remnant piece from a heap of individual pieces of lace that were all equally tempting! I was particularly attracted to this one because it had a beautiful zigzag selvage that I thought I could incorporate into the hem somehow. Several people have asked me if it's a Missoni fabric; It isn't, but happy to pretend!

As I mentioned, this was a pretty challenging project. The lace fabric was extremely slippery and the very bold print meant I really had to ensure that the pattern matched throughout the garment. I started off by tracing out the required pattern pieces onto dot and cross paper, making a full sized piece for all of the pieces marked to cut on the fold. This made lining up the stripes much easier!

I checked my size against the finished garment measurements and opted for a size 4 across the shoulders out to a size 10 at the waist and a size 14 across the hips. Once I laid the pattern onto the fabric I realised that I didn't have quite enough fabric to line up all the pieces, but also that the pieces looked really huge, even though the dress is intended to have an elasticated waist. Returning to the pattern I discovered that it had been designed with 8.5 inches of ease! 8.5! I proceeded to reduce the pattern pieces down to sizes 4-6-8 to remove a lot of this ease. I also shortened and re-curved the hemline by 8 inches at this point, so that the front would fall just on the knee and the dropped hem at the back would fall to mid calf. 

Once I had cut out all of the pieces and lined up every possible zigzag, I cut the same pieces out in a fine purple cotton lining. This isn't called for in the pattern instructions, but the fabric was far too sheer to go without, and the neckline would not have lent itself to a slip. From here on the majority of the construction was completed on the overlocker which handled the fabric beautifully. 

One of the most interesting features of the dress is the neckline. The halter style is created by inserting three curved neckline pieces into a channel, rather than using a strip or fabric or ribbon. For the channel section I cut away the lining fabric at the seam allowance to prevent bulk. 
Pattern matched through the neck facing!
Finished centre back fastened with covered buttons and hand stitched button loops. 
The dress has an elasticated waist sewn into another channel which I created between the lining and outer layers. Two long strips of fabric then form ribbons which pass through these (pattern matched) button loops and are tied together in a bow at the back.

The hemline detail was my main focus throughout the creation of this dress. Having made my wedding dress a few years ago I'm no stranger to attaching a lace hem, but I knew this was going to be hand-stitch hell. To get the selvage from the fabric I used small, sharp scissors to cut around the zig zag design for the full 1.5 metre length of the edge. The edge of the garment is overlocked and then the lace trim was placed over the top, lined up with the design and then hand stitched to create an almost invisible finish.
The selvage stitched on to the hem.
And here is the finished garment! It has turned out even more lovely than I could have hoped!


 Here I am wearing the dress on a recent trip to Harrogate.


---

The materials for this project were sourced at the Craftea Sewing Bee Shop at 22-24 Melville Street, Lincoln. The pattern was kindly donated by Simplicity Patterns.