Showing posts with label lincoln. Show all posts

Monday, 1 May 2017

Heather: April Makes

A pinch and a punch...! It's the first of the month so time for my April sewing roundup. 


The month started with a bit of 'selfless sewing' for my lovely sister-in-law, Jenny, who visited on the first weekend of the month. I've made a few items for her before and had promised to make something new for her to take on her holidays later in the year. We had a good look through the stash and found a piece of blue floral jersey that I had purchased at last year's NEC sewing show and then promptly forgotten about! She picked the Simple Sew Lena Wrap Dress and we left the boys to cook dinner whilst we set about making her dress. I've made a wrap dress for Jen before but it was a bit revealing over the bust so,  following various advice from other sewers online, I decided to do a full bust adjustment which I've never done before. This actually turned out to be a complete waste of time because this pattern is massive! I was working to the finished garment measurements but still ended up taking nearly 4 inches out of the bust and waist. Thanks to the trusty overlocker this was finished in less than 4 hours, and I think she liked it, as she told me she wore it twice the following week!
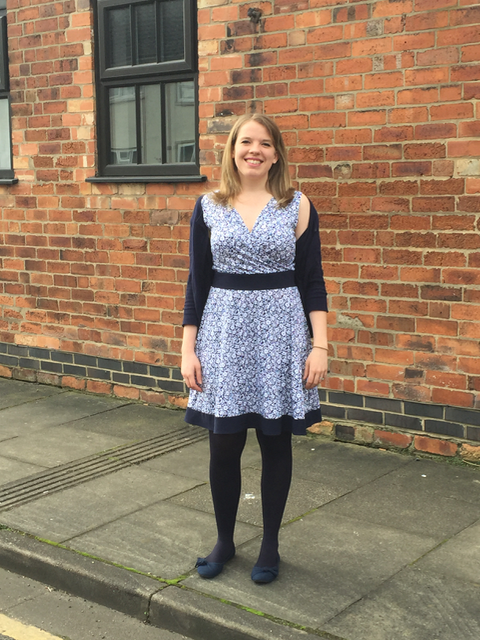

My next make is one that I am going to unashamedly describe as my 'masterpiece'. I am so, so thrilled with it. 

This stunning 'Art Nouveau' print viscose was just £4.99/m at the NEC Sewing Show. "£4.99 per metre for this beauty? I would have bought the roll" I hear you cry. I hear you, because I was yelling it to myself when I realised I had only purchased 1.5m, and that the absolutely-perfect-for-the-job Threaders pattern I had got free with a magazine needed 2.5m. 


Never one to be defeated by a piece of fabric, I set about making a wearable toile, made a few adjustments to the bodice length and shortened the sleeves by about 6 inches. I also drafted a front facing piece as I didn't want to line the dress. Once I was happy with the fit I used the muslin pieces as templates to make sure the pattern placement was perfect. I knew I wouldn't be able to match it up perfectly, but good pattern placement is just as important.  It took me a whole evening to cut everything out perfectly but it was totally worth it. I removed the seam down the centre back but still had to cut the skirt as two pieces because there simply wasn't enough fabric.I wore the finished dress to my Mum and Dad's Birthday Party at the beginning of the month and got some fab pics in their garden. 


My third make of the month was a new blouse from the pattern I self drafted last year. The fabric is a floral cotton with an almost cheesecloth texture from Fabric Corner. As the fabric is summery I decided to shorten the sleeves a little and add a peter pan collar using this fab tutorial from House of Pinheiro. It looks fab with my Cleo Dungaree Dress, which is starting to grow on me!


It was my Birthday in March and this piece of floral viscose from Fabric Corner was a very gratefully received gift, as I had been eyeing it up for quite a while! I also received a copy of the Simple Sew Lucille dress and seeing as I have a few events coming up in May I decided to have a go at something that would be suitable for a smart lunch. I had to make quite a few adjustments to the pattern to get a good fit. I shortened the bodice length at the centre back to prevent the zip from curling under; I shortened the bust pieces at the point of crossover so that I don't have any scary "eyeful' moments; I moved the front skirt pleats because they were marked in a very odd place on the pattern, and despite following the finished garment measurements on the packet I ended up letting out the side seams on the skirt as much as possible because I couldn't actually sit down (or eat any pork pies which, frankly, is more important to me.) 

Annoyingly, once I had then totally finished everything, tried it on 5 times during the making process and then hung it in the wardrobe for a week, I tried it on again and discovered that I need to pull the shoulders up by an inch to stop it gaping at the back. I'm not sure whether I missed this or whether the fabric has stretched being on the hanger, but hopefully this will get altered before the event. 

My final make for the month was actually a remake. I made this yellow tunic dress last year from the Simple Sew Colour Block Dress pattern, and whilst I'd worn it a few times last summer, I was never totally thrilled with the fit and finish. When the yellow jersey appeared at Fabric Corner once again, I decided to make some changes. 


I had a flash of inspiration that I could turn it into my new favourite, the Moneta Dress, so I decided to unpick the sleeves and side seams and cut out the bodice and sleeves from the tunic. I used the excess fabric from the tunic to make the pockets and cut a new skirt from the extra fabric I had purchased. 
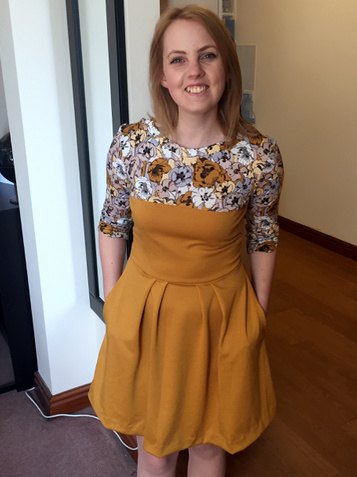

A much more 'me' dress!

So finally I just want to introduce this month's #dressmakingbloggerchallenge
May for me means Maypoles and spring dresses, so this month's theme is Stripes! 


Happy Sewing everyone, see you next month!


Monday, 26 December 2016

Heather: The night before Christmas...

... I wasn't sewing (!), having finished my dress with loads of time to spare (around lunch time on Christmas Eve). I’d been planning my dress for quite a while this year, but with so many lovely gifts on the making list I wasn’t convinced I’d actually get the time to finish it.
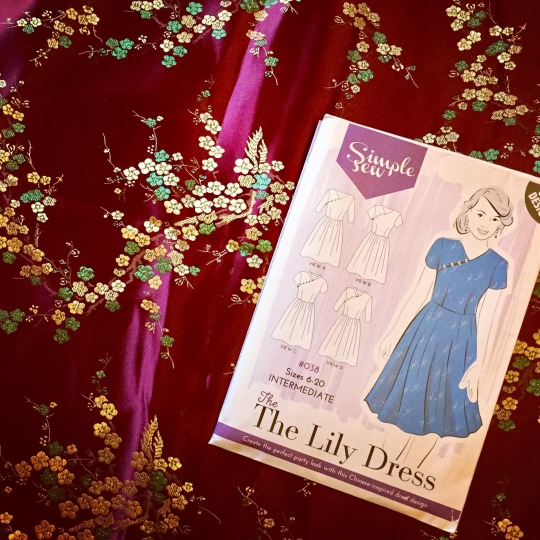
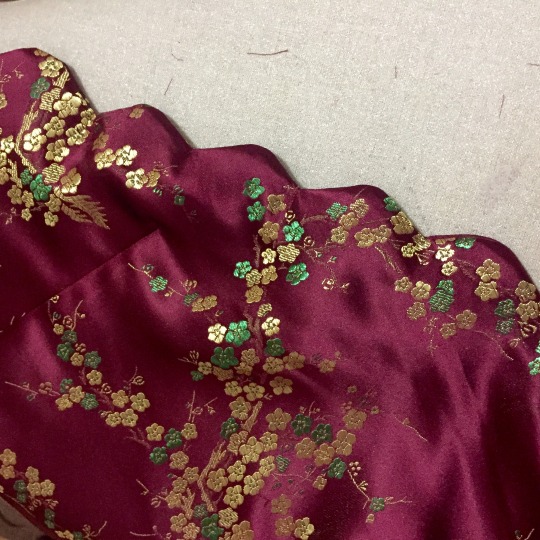
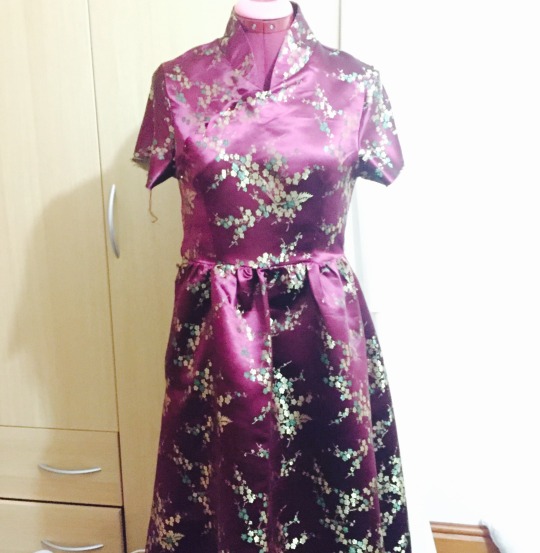
Last year some time a friend of mine had a big destash and gave me three sackfuls of beautiful fabric, which included some stunning Chinese style silk brocade. It sat undisturbed in my stash until I picked up an edition of Love Sewing magazine in Autumn 2016 with the Lily dress on the cover. Ordinarily I wouldn’t be especially interested in a Chinese style dress, but the opportunity was too good to miss with such a perfect fabric option in my stash. I chose option D for the collar and wavy edge detail at the neckline, with the short sleeves from option B/C.
image
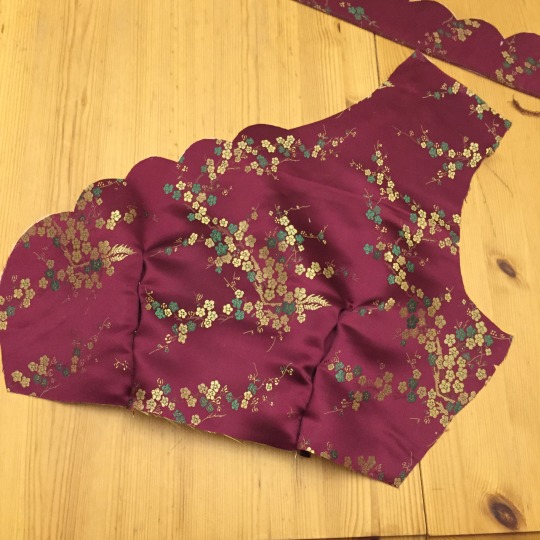
Upon inspection, what looks to be a very technical pattern is actually quite straightforward: simple front and back skirt and back bodice panels, with just the shoulder detail adding a little more of a challenge. I knew the bodice would need some alteration to achieve a good fit, so I started by cutting out the skirt panels and getting those out of the way. I then used my trusty pattern block to check the bodice fit. Now, normally I find that Simple Sew patterns are generously fitted and I tend to need to take 1/2″ out of the back length and grade the width from an 8 bust to a 12 waist. The measurements on the back of the pattern also indicated this would be the case. I was surprised, then, that after comparing to my pattern block, I found myself needing a 12 bodice graded only slightly to a 10 under the arms, and then out to a 14 waist! This pattern is a completely different fit to other garments in the range and just goes to show the need to measure twice on every pattern! 
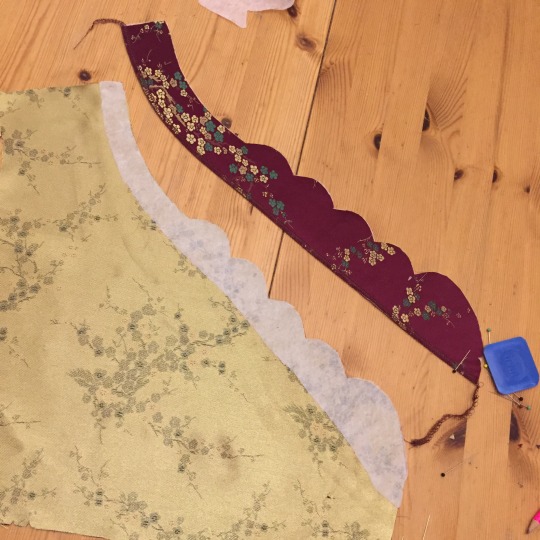
Those of you who are avid Sewing Bee fans will remember a challenge in the middle of the series where the contestants were tasked with making a Cheongsam Chinese-style top, which had many similar features to my garment. You may also remember that many of the sewists struggled with the relentless fray in the fabric (seriously, I’ve never seen anything like it!) and how easily it could pull out of shape, even with careful sewing. For this reason I stabilised each of the seams on the shoulder detail with interfacing before stitching, clipping and grading the seams and turning through.


Bodice complete, I gathered the skirt (not recommended in this fabric!) and attached it to the bodice.
And I hated it! Granted, in this (poor quality) picture the seams haven’t been pressed open and it’s not hanging straight on the mannequin, but it just didn’t look right. I felt the full skirt gave me a bit more room for the Christmas Turkey than I possibly needed and I knew I just wouldn’t wear it. 
After 24 hours of consideration and a quick walk around the shops for inspiration, I spent the evening of the 23rd removing and recutting the skirt panels using the skirt section from Threadcount 1613, which I used in my previous post for the Velvet Burnout dress. The straight skirt sits so much better than the a-line one, and is much more in-keeping with the Chinese style. 
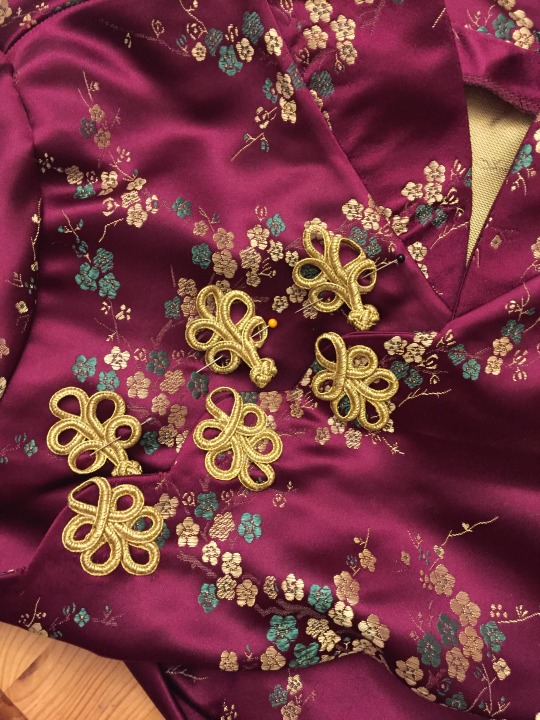
I finished off the dress with some traditional frog fasteners, purchased from a fair trade supplier in Hong Kong via Etsy.
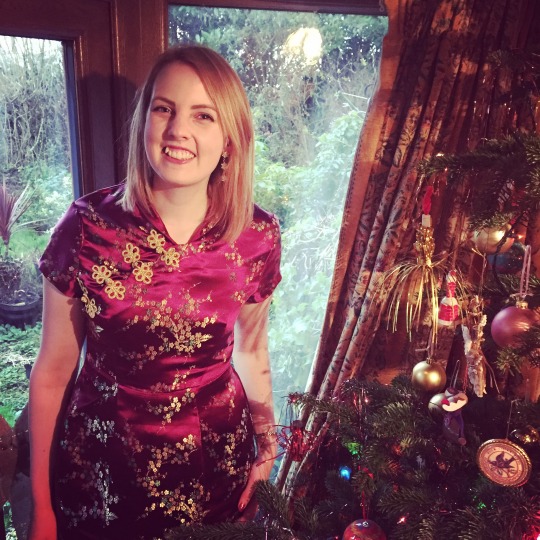
So here I am wearing my dress on Christmas Day!
After a whole day of wearing it I was being driven totally mad by the sleeves and I will definitely be taking them off and recutting them an inch winder across the arm. I’d probably also widen the shoulder width if I made it again, and whilst I much preferred the straight skirt, I definitely should have allowed more room for turkey! But I got lots of lovely compliments on the day and it definitely did the job of being a “wow” Christmas Day dress.
--
Me and my “little” Bro continuing the lifelong tradition of a picture in front of the tree on Christmas Day.
 

Thursday, 15 December 2016

Heather: Speedy makes and December sew far

Once again it's been a month since I shared my makes with you (really, where has 2016 gone?), but it's been a really productive month at the sewing machine, so I thought I'd give you a bumper roundup of some of my recent makes. Each of these projects were "speedy sews", made in a single evening, or in some cases, just a few hours! Hopefully you'll feel inspired. 
 

Velvet Burnout Party Dress
 
First up is Threadcount 1613 made up in a sparkle velvet burnout fabric, made up in around 4 hours. I made quite a few adjustments to this pattern, particularly on the back panels and shoulders, both of which were shortened and tweaked by about an inch to get a more precise fit in the bodice. The fabric itself is quite firm- it has stretch but behaves more like a stretch denim than a jersey- but this allowed for a really close fit without compromising my ability to breathe! 

I'm not normally a fan of a peplum, always believing them to make my bum look big, but I pinned this one together and was pleasantly surprised with the fit and styling, so it made the final cut!


Floral Heather Dress
 
Next up, a version of the Heather Dress by Sew Over It (I had to!). Again, a one-evening make as I had already made a version in red sweater knit for practice and I was able to make the entire garment on the overlocker. The fabric is a heavy weight jersey with a low % stretch. The slightly lower than required stretch meant that I needed to allow a little more room over the bust and across the arms than the previous version. I also made two simple alterations to this pattern, adding a cuff to the sleeves (cut sleeves shorter, sew a rectangle of fabric, short edges together, fold lengthways, attach to sleeve!) and a slightly deeper neck band for a roll neck effect. This dress is so comfortable that I want one in every colour!


Stripy Jumper Dress
 
My next speedy make was a self drafted jumper dress made after work on a Friday evening (started at 4.30) and worn out to dinner the very same night (at 6.30!). The pattern started life as a simple shift dress from Burda, to which I added a grown on sleeve, to make, essentially, a giant t-shirt! I've made this pattern up before in black and white ponte and it's a real wardrobe staple for warmer days in the office, so when I saw the pink and navy stripe I knew exactly what I wanted to make. On this version I lengthened the sleeve to the elbow and then added a panel for the lower sleeve. I also added a wide neckband for an extra level of coziness! 
  

Dashwood Annabelle 
 
And last, but by no means least, we have Annabelle, the absolutely gorgeous new floral dress I whipped up last weekend to wear out for lunch with my Nanna. The pattern was free with December's Love Sewing Magazine and the design was quite straightforward. The new Paper Meadow range by Dashwood has some beautiful coordinating fabrics and I knew straight away I wanted to use these together. I also picked up some orange cotton lawn to use as the lining and set to work! As usual I shortened the back length by about an inch at the lower back, and also at the shoulder by 1/4". I did also adjust the front bodice length slightly at the neckline, deepening the curve by about 1/2". I started sewing after Saturday night's Strictly and was at the restaurant by Midday on Sunday! 


-
All of the fabrics used were sourced from Fabric Corner at the Craftea Sewing Bee Shop, 22-24 Melville St, Lincoln. Call in for your next speedy sewing project!

Saturday, 24 September 2016

Heather: Badgley Mischka Wedding Outfit

Today I attended the wedding of some good friends (Congratulations Mr and Mrs S!) and, of course, I was wearing handmade! 
My hunt for a pattern worthy of the occasion started on the pattern pages at Sew Essential. I particularly like Sew Essential's website for browsing patterns because you can search both by type of garment, and by designer. I don't know about you, but I find it frustrating when I have to flick between lots of brands to find what I want- I just want to look at ALL of the dresses! In the end, my inspiration came from Sew Essential's twitter post:
@sewessential: New season Vogue #sewingpatterns now in stock here https://t.co/mNys0VIOhf there are some beauties! @McCallPatternCo
Vogue 1513
— Sew Essential August 18, 2016
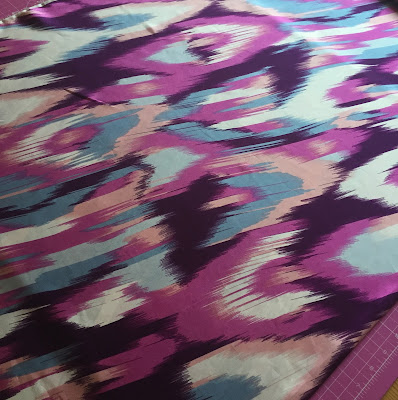
Once I had finished swooning over the pattern I set out to look for a suitable fabric (Of course, there was nothing suitable in my stash...). Now you'll recall from a few posts ago that Sew Essential have a great selection of dressmaking fabrics, and I was really spoiled for choice choosing a suitable fabric (they really are all gorgeous). I finally whittled my 15-strong selection down to this beautiful smudged paint print by John Kaldor in a polyester Crepe de Chine. 

John Kaldor Cassandra fabric available at Sew Essential.
The fabric has really beautiful drape making it perfect for the shoulder detail on the dress. It also means that it's pretty slippery, so my first step with this pattern was to trace out all of the pattern pieces in the correct sizes onto dot and cross paper, and in the full size rather than on the fold. This meant that I didn't have to battle with the slippery fabric in two layers. I made up a toile using some peach viscose lining fabric which was a little crisper than the crepe de chine, and I hoped this would give the dress some body. 

It turns out that making a toile was a pretty good idea! I started with a size 6 graded through to a 14 at the waist and hips. I shortened the back shoulder length by an inch and reshaped the armholes for comfort. Once I had completed the toile I then proceeded to resize the waist of the dress back down to a 10/12- it was huge! I also made some minor adjustments to the top of the princess seam under the arms (this detail will be important later) to improve the fit across the bust. 

Happy with the toile fit I made the alterations to the paper pattern and cut my dress out with my trusty rotary cutter and cutting mat. It still moved around a lot, but was certainly easier than using scissors. I assembled the main garment and then cut out the drape, finishing it with a machine-rolled hem for a neat finish. 

Drape detail.
I hadn't cut the drape out when I did the main dress cutting, as I wanted to avoid any excess fraying. It turns out that this is, yet again, one of those times where I should have read the instructions... You're supposed to insert the shoulder drape into the front right princess seam, tack it in place around the armhole and neck, and then attach into the centre back. Of course, I had already stitched and overlocked all of these seams... cue stitch unpicker.

The second challenge with the drape was the fit. Remember all of those tiny tweaks I made around the armholes earlier? Turns out I needed to transfer those onto the drape too, as the drape fits closely into the shape of the armhole. I had removed about an inch from the armhole depth and length you can see in the picture below that the underside of the drape hangs about 2 inches lower than the top layer.  Desperate to avoid reshaping from the bottom of the drape and ruining my rolled hem, further unpicking was required.

Drape detail
The rest of the make was much smoother. I finished all of the seams with the overlocker and hand stitched the hem. I even found time to make a matching fascinator, and asked my friend to design me some matching nails!


Here's the finished dress in action. What do you think?


--

The fabric and pattern used in this blog were kindly provided by Sew Essential. Browse the site at www.sewessential.co.uk

Tuesday, 5 July 2016

Heather: Colette Macaron Summer Spots

Back in May Bridie and I bumped into the lovely Lucy from Sew Essential at The Big Simplicity Blog Meet in Manchester. Sew Essential is a comprehensive and easy to browse fabric and haberdashery site with a huge range of both dressmaking and crafting patterns, from indie brands as well as the big boys; high quality dressmaking fabrics (at prices that don't trigger a call from the bank) and even sewing machines and accessories (basically they have all the things and I want one of everything...).

If you're not a follower of the independent pattern circuit, Colette Patterns produce "Sewing patterns that teach" and have been on my wish list for a while. They have some unusual shapes and styles, and even better they seem to be designed to fit real people- with bums and everything! The pattern packets themselves are rather lovely too. Each package contains a detailed instruction booklet and a multi-sized pattern which is printed onto tissue- much preferred to the heavier paper that is becoming very popular. The pattern is stored in a special pouch in the back of the packet, which is stitched up along the edge to form a booklet to keep everything together. I can just imagine a selection of these sitting on my shelf like tiny books!


Already in love with the pattern, a quick look on Pinterest reassured me that the pattern would lend itself to almost any combination of fabrics, so I was rather excited to find this 100% cotton poplin fun printed spot fabric I could team up with some plain white cotton from my stash. I washed the fabric before using and there was no shrinkage or colour run, though obviously being 100% cotton it did need a good steamy press once it was dry!
Pale Blue multi-spot print cotton poplin fabric from Sew Essential.  
Checking my measurements, I decided to cut the pattern graded from a size 0 at the bust, size 4 at the waist through to a size 8 at the hip. Now before you start worrying for my health, I should point out that the size 0 on these patterns is not in any way indicative of high street dress sizes. The 0 measures B33 W25 H35 which is much more like a size 8-10 from one of the major pattern companies.

Following the instructions (who is this girl?) I created the front and back bodice sections first. The pattern calls for the bodice sections to be turned under 1.5cm along the top edge, positioned over the front and back yoke pieces and then top stitched together. For both the front and back sections I tacked the bodice sections in place and checked for fit before committing my final stitches. The front bodice fitted really nicely, but the back ended up being almost 2 inches too long in the back. Luckily this pattern rather lends itself to alterations- you can just see the stitching line in the picture below showing the final position of the bodice back section. 


The skirt front has two pockets concealed into a slashed dart behind the outer pleats (sounds technical, right?). I used the spot fabric for the pocket back (most likely to be seen) and a polyester lining for the inner half to reduce bulk over the tummy. Whilst I've constructed plenty of pockets before I found the particular instructions for these pockets to be the most clear and easy to follow of any of I've tried previously. The pockets went in perfectly first time with no hassle. 

Once the pockets were constructed, a concealed zip was inserted into the side seam. The sleeves are constructed from two pieces sewn right sides together and pressed to create a smooth sleeve hem. And there we have it; Hey Macaron-a...!


Pleased to have taken the extra time to get the back fitting really nicely!

Here are some tips for you, if you're thinking of having a go at the Macaron dress:

  • Don't be frightened to grade the pattern across several sizes to get a better fit
  • Personally I found the shoulders to be very narrow on the size 0 despite the fit being excellent elsewhere. Check the measurements before you cut!
  • This pattern would totally work without sleeves, or you could lengthen the sleeve to just above the elbow for a more formal look. 
  • I'm only 5'3" and this dress sits well above the knee. You may want a longer version!
Personally, I wouldn't change a thing about my dress! I'm already planning a winter version with some checked wool and denim. In fact, I think I'll have one in every colour!

--
The fabric and patterns used in this blog were kindly provided by Sew Essential. Browse the site at www.sewessential.co.uk

Friday, 22 April 2016

Heather: Patti floral dress

Back in October 2015 I picked up a copy of the Burda Style Special magazine. (For those of you who have never heard of it, it's a sewing magazine containing 64 free 'trace-it-yourself' patterns each month.) The October special had a 60s theme and was where I first spied the gorgeous Patti empire line dress.

Patti Dress from www.burdastyle.com


With a contrast collar and cuffs this dress is a vintage-lover's dream, and since then I've made it in several colours and styles. (Sorry about the picture quality!)

Navy polyester with contrast in lighter blue viscose.


Stripe knitted fabric with collar and cuffs made from leftover pieces of jumper!
I even made a version for my Mum from this orange floral cotton mix fabric with corduroy collars and cuffs.


But by far the pièce de résistance is this version in black floral, 100% viscose from Fabric Corner. As soon as I saw the fabric I knew it would make a perfect 'Patti'. I decided against contrast collars and cuffs on this one. Despite finding a great spot-contrast in my stash I decided the matching collar was more suitable for this one. (Do you think I made the right decision?)

Instead the spot contrast is on the inside, for a fun detail. I added some vintage style buttons, picked up at a sewing show in Harrogate last year, for a true vintage feel.

I am totally thrilled with the results on this dress. It's goes perfectly with my peach shoe boots and I've worn it twice in a week!

--

All fabrics featured in this post were sourced at Fabric Corner Lincoln, based in Lincoln's historic Central Market and at 22-24 Melville Street Lincoln.

Happy Sewing!