Showing posts with label wedding outfit. Show all posts

Saturday, 12 November 2016

Heather: African Adventures

The last few weeks since our holiday have absolutely flown by and I have been holed up in the sewing room with a couple of really special secret sewing projects (try saying that three times quickly!), which I hope to share with you at some point in the future. In between circles of chiffon and layers of lace I managed to squeeze in a quick selfish sew in this stunning African Wax Print from Fabric Corner.

Unsurprisingly, I picked this fabric with absolutely no idea what I would make with it, (stash? What stash?) but without doubt that it was too good to leave behind. If you've handled african wax print before you'll know that the fabric itself is quite stiff- the texture is like a good quality wrapping paper. It has movement but doesn't drape, and it didn't really soften in the wash. After sitting in my stash for several weeks an event came up which I knew the fabric would be perfect for and I set about finding an appropriate pattern. A quick research on Pinterest for pattern inspiration found a whole host of elaborate wax print dresses with full skirts, fitted bodices and, often, exceptional pattern matching. No pressure then. 
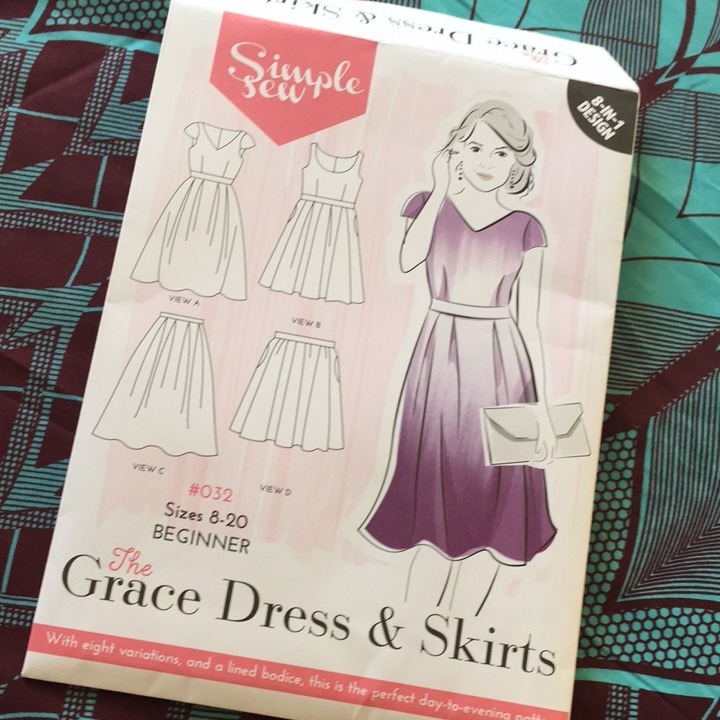
Looking at the images shared by others I realised I needed to make a full skirt with pleats rather than gathers, and a simple bodice that would show off the pattern without too many seams. A search through my pattern stash came up short, and just as I was about to fetch my trusty pattern block to begin drafting I picked up a copy of Love Sewing magazine with the free Grace Dress pattern on the front. Fitted bodice and full pleated skirt? Perfect!

Now, I've had a fair bit of experience with pattern matching to date but this print was really a level above. I wanted to make the most of the varied print sections on the fabric and use the heavy border mostly in the skirt. After tracing out the entire pattern as 'full size' pieces (i.e. not on the fold), moving them about on the fabric for about an hour and wishing I had a longer ruler to line up the stripes with, I decided to abandon the skirt pattern pieces in favour of drafting the skirt from scratch. I started by working out the finished garment length, and then marking a chalk line along the full 2m length fabric. I then chose the detail I wanted for the centre point of the skirt, marking this again with chalk, eventually dividing the full two metres into one large and two slightly smaller rectangles. I shaped the waist slightly and then stitched the blocks back together to make the basic skirt. I was pretty pleased with the pattern match in the side seams!
Can you spot the seam?
I made up a quick toile of the bodice to check the fit. Simple Sew patterns are known for being quite roomy but this looked quite small and I was right to be wary- I made a few adjustments and increased the waist size by reducing the back darts, and swinging some excess from the armscye into the waist to get a really good fit. I did include the short capped sleeves on my toile but the shape totally didn't fit me (maybe I have fat shoulders?!) so I drafted a split sleeve instead once again inspired by pinterest.
They look like giant moustaches! 
I spent a considerable amount of time choosing how to place the pattern on the bodice, and used a reverse pattern piece (also known as a piece of paper with a bodice shaped hole in it) to work out where the pattern would sit, eventually deciding on two strong lines either side of the centre at the waist. I pleated the skirt panel to match the pattern from the bodice- much easier than trying line up pleats from the pattern piece.

Pattern matching the skirt and bodice.
I made the waistband out of a single strip of fabric, so it was important for the bodice fit to be perfect before I attached it- no going back once the waistband was cut!


Pattern match through the waistband. 

I took my time to make sure the pattern matching was exactly right!
Pattern match through the zip.
Sleeve detail.
So after a number of weeks of waiting to show this beauty off the special event finally arrived and here is my dress! I can't pretend I'm not super proud of this one! The pattern itself was so simple but the addition of such a bold pattern really set me a challenge. And I loved every second of it.


--
The fabric used in this post was kindly provided by Fabric Corner Lincoln, based at The Craftea Sewing Bee Shop, 22-24 Melville Street Lincoln, and at Lincoln's Historic Central Market.

Saturday, 24 September 2016

Heather: Badgley Mischka Wedding Outfit

Today I attended the wedding of some good friends (Congratulations Mr and Mrs S!) and, of course, I was wearing handmade! 
My hunt for a pattern worthy of the occasion started on the pattern pages at Sew Essential. I particularly like Sew Essential's website for browsing patterns because you can search both by type of garment, and by designer. I don't know about you, but I find it frustrating when I have to flick between lots of brands to find what I want- I just want to look at ALL of the dresses! In the end, my inspiration came from Sew Essential's twitter post:
@sewessential: New season Vogue #sewingpatterns now in stock here https://t.co/mNys0VIOhf there are some beauties! @McCallPatternCo
Vogue 1513
— Sew Essential August 18, 2016
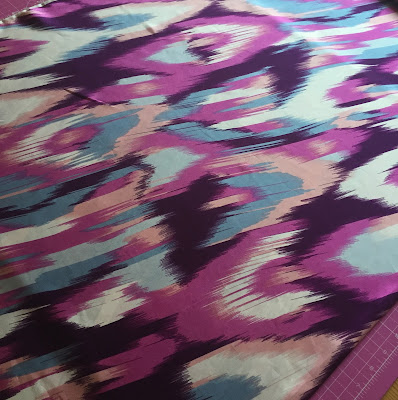
Once I had finished swooning over the pattern I set out to look for a suitable fabric (Of course, there was nothing suitable in my stash...). Now you'll recall from a few posts ago that Sew Essential have a great selection of dressmaking fabrics, and I was really spoiled for choice choosing a suitable fabric (they really are all gorgeous). I finally whittled my 15-strong selection down to this beautiful smudged paint print by John Kaldor in a polyester Crepe de Chine. 

John Kaldor Cassandra fabric available at Sew Essential.
The fabric has really beautiful drape making it perfect for the shoulder detail on the dress. It also means that it's pretty slippery, so my first step with this pattern was to trace out all of the pattern pieces in the correct sizes onto dot and cross paper, and in the full size rather than on the fold. This meant that I didn't have to battle with the slippery fabric in two layers. I made up a toile using some peach viscose lining fabric which was a little crisper than the crepe de chine, and I hoped this would give the dress some body. 

It turns out that making a toile was a pretty good idea! I started with a size 6 graded through to a 14 at the waist and hips. I shortened the back shoulder length by an inch and reshaped the armholes for comfort. Once I had completed the toile I then proceeded to resize the waist of the dress back down to a 10/12- it was huge! I also made some minor adjustments to the top of the princess seam under the arms (this detail will be important later) to improve the fit across the bust. 

Happy with the toile fit I made the alterations to the paper pattern and cut my dress out with my trusty rotary cutter and cutting mat. It still moved around a lot, but was certainly easier than using scissors. I assembled the main garment and then cut out the drape, finishing it with a machine-rolled hem for a neat finish. 

Drape detail.
I hadn't cut the drape out when I did the main dress cutting, as I wanted to avoid any excess fraying. It turns out that this is, yet again, one of those times where I should have read the instructions... You're supposed to insert the shoulder drape into the front right princess seam, tack it in place around the armhole and neck, and then attach into the centre back. Of course, I had already stitched and overlocked all of these seams... cue stitch unpicker.

The second challenge with the drape was the fit. Remember all of those tiny tweaks I made around the armholes earlier? Turns out I needed to transfer those onto the drape too, as the drape fits closely into the shape of the armhole. I had removed about an inch from the armhole depth and length you can see in the picture below that the underside of the drape hangs about 2 inches lower than the top layer.  Desperate to avoid reshaping from the bottom of the drape and ruining my rolled hem, further unpicking was required.

Drape detail
The rest of the make was much smoother. I finished all of the seams with the overlocker and hand stitched the hem. I even found time to make a matching fascinator, and asked my friend to design me some matching nails!


Here's the finished dress in action. What do you think?


--

The fabric and pattern used in this blog were kindly provided by Sew Essential. Browse the site at www.sewessential.co.uk